
Linux
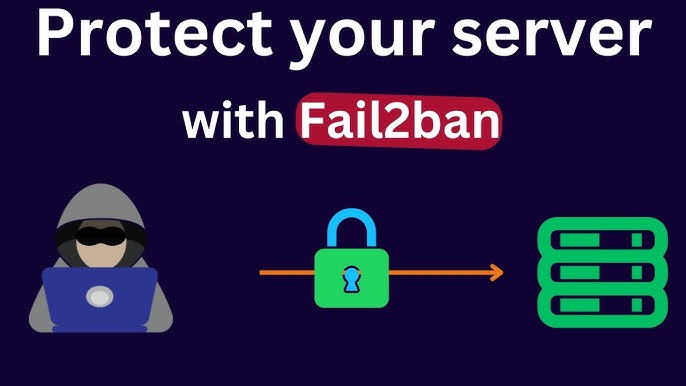
How to Use Fail2Ban for Ultimate Linux Server Security
Imagine waking up one morning to find your Linux server compromised by cyber attackers. It’s a nightmare scenario, but it’s more common than you’d think.
Protecting your server is not just about installing antivirus software and hoping for the best. You need robust tools, like Fail2Ban, to shield your system from malicious attacks. Fail2Ban is a powerful, yet straightforward tool that can significantly enhance your server’s security by automatically scanning log files and banning IPs that show signs of malicious activity.
But how exactly can you use it to safeguard your server? You’ll discover step-by-step how to implement Fail2Ban to fortify your Linux server against potential threats. Stay with us as we guide you through the process of making your server a fortress against cyber intrusions.

Credit: www.tecmint.com
Installing Fail2ban
Protecting a Linux server from unauthorized access is crucial. Fail2Ban is a powerful tool that helps prevent unwanted intrusion. Installing Fail2Ban is the first step towards securing your server. This section provides a straightforward guide to install Fail2Ban on your Linux system.
Step 1: Update Your System
Start by updating your server’s package list. Open the terminal and execute the command:
sudo apt-get updateUpdating ensures you have the latest package versions available.
Step 2: Install Fail2ban
Once the system is updated, proceed to install Fail2Ban. Use the following command:
sudo apt-get install fail2banThis command downloads and installs Fail2Ban on your server.
Step 3: Verify Installation
Check if Fail2Ban is installed correctly. Type this command in the terminal:
fail2ban-client versionIf installed, it will display the current version of Fail2Ban.
Step 4: Enable And Start Fail2ban
Enable Fail2Ban to start automatically at boot. Use the command:
sudo systemctl enable fail2banThen, start the Fail2Ban service with:
sudo systemctl start fail2banEnsuring Fail2Ban is active is crucial for server protection.
Step 5: Check Fail2ban Status
Confirm Fail2Ban is running properly. Execute this command:
sudo systemctl status fail2banIf active, you will see the service is running message.
Configuring Basic Settings
Configuring basic settings in Fail2Ban is crucial for server security. These settings control how Fail2Ban monitors and reacts to potential threats. Proper configuration ensures your Linux server remains safe from unauthorized access. Let’s explore how to set up these basic settings effectively.
Understanding Jail Configuration
Jail files define how Fail2Ban protects your services. Each jail file contains settings for different services like SSH or Apache. You can find these files in the /etc/fail2ban/jail.d/ directory. Open a jail file to edit it with a text editor.
Setting Up Ignore Ip
Set trusted IPs to avoid accidental bans. Add these IPs to the ignoreip line in the jail file. Separate multiple IPs with spaces. This ensures trusted devices remain unaffected by Fail2Ban rules.
Defining Ban Time And Find Time
Ban time determines how long an IP stays banned. Adjust it to suit your needs. The bantime setting controls this duration. Find time is the window in which attempts are counted. Use the findtime setting to adjust it.
Configuring Max Retry Attempts
Limit the number of failed login attempts. The maxretry setting controls this limit. Set a number that balances security and convenience. Too low may inconvenience legitimate users.
Enabling And Testing Jails
Activate your configured jails using Fail2Ban commands. Use fail2ban-client status to check active jails. Test the setup by attempting failed logins. Ensure Fail2Ban bans the IP after the set retries.
Setting Up Jails
Fail2Ban helps protect Linux servers by setting up jails to block suspicious IP addresses. Configure and customize jails to detect and prevent unauthorized access effectively. Enhance server security with easy-to-follow steps to implement Fail2Ban.
Setting up jails in Fail2Ban is like building a fortress around your Linux server, fortifying it against unwanted visitors. This crucial step allows you to specify which services you want to protect and how you want to respond to suspicious activities. By configuring jails, you create a tailored defense mechanism that fits your server’s specific needs. ###Understanding Jails And Filters
Fail2Ban uses the concept of jails to monitor different services. Each jail is associated with a log file and a filter. The filter defines what constitutes a suspicious activity. Think of filters as your server’s bouncers—they check the logs for any unwanted behaviors. If a filter finds a match, the associated jail will take action, like banning an IP address. You can find predefined jails in the default configuration file, but understanding them helps you customize your server’s protection. ###Creating Custom Jails
Sometimes, the default jails don’t cover all your needs. This is where creating custom jails comes into play. You might have a unique service that requires specific protection. Start by defining a new jail in the jail.local file. Specify which log file Fail2Ban should monitor, and choose an existing filter or create a new one. For instance, if you’re running a custom web application, you can create a jail that monitors its access logs for failed login attempts. This flexibility allows you to protect every corner of your server without overburdening it. Custom jails enable you to respond swiftly to security threats unique to your setup. Isn’t it empowering to know you have control over your server’s security? Setting up these jails can make you feel like a digital security expert, safeguarding your data from potential breaches. How will you tailor your server’s defenses today?
Credit: wafaicloud.com
Adjusting Ban Time And Find Time
Securing your Linux server with Fail2Ban involves more than installing it. Configuring specific parameters like ban time and find time is crucial. These settings determine how long an IP is blocked and the period to detect malicious activity. Proper adjustment can significantly enhance your server’s security.
Customizing Ban Durations
Ban durations dictate how long a suspicious IP stays blocked. Short ban times might allow repeated attacks. Longer durations deter persistent offenders. Customize this setting based on your server’s needs. A common approach is starting with a moderate ban time. This allows flexibility in monitoring the server’s response. Consider the nature of your server’s traffic. Frequent legitimate connections might require shorter bans.
Configuring Find Time Intervals
Find time intervals define the period to track failed login attempts. A shorter find time may catch bursts of attacks quickly. Longer intervals help identify slow, persistent threats. Adjust these settings according to your server’s vulnerability. Balance is key. Too short, and you might miss prolonged attack patterns. Too long, and you could block innocent users. Test different intervals to see what works best.
Monitoring And Logging
Monitoring and logging are vital for server security. Fail2Ban helps keep your Linux server safe by tracking failed login attempts. It records these attempts in log files. This section explains how to access these files and analyze the data. Understanding this helps you spot potential threats early. Let’s dive into the details.
Accessing Log Files
Log files store failed login attempts. You can find these files in the /var/log directory. Common log files include auth.log or secure. Use the cat command to view them. Or, use tail -f to view real-time updates. This helps you see what’s happening as it occurs.
Analyzing Failed Attempts
Review the logs for repeated failed logins. Look for patterns or multiple attempts from the same IP. This might indicate a brute-force attack. Note the time and frequency of attempts. Use these insights to adjust your Fail2Ban settings. This ensures better protection against intruders.
Whitelist And Ignore Ips
Protect your Linux server using Fail2Ban by whitelisting trusted IPs. Ignore unwanted IP addresses for enhanced security. This tool automatically bans malicious IPs, keeping your server safe from attacks.
In the realm of server security, Fail2Ban stands out as a powerful tool, offering protection against various cyber threats. One of its critical features is the ability to manage IP addresses through whitelisting and ignoring. This ensures that trusted connections aren’t mistakenly blocked while unwanted or malicious connections are effectively kept at bay. Understanding how to properly configure these settings can make a world of difference in maintaining the integrity of your Linux server. ###Adding Trusted Ips
Adding trusted IPs to your Fail2Ban configuration can prevent unnecessary headaches. By doing this, you ensure that known and safe connections aren’t inadvertently blocked. Imagine trying to access your own server and being locked out due to an overzealous security measure! To add a trusted IP, you need to modify the `ignoreip` line in your Fail2Ban jail configuration file. This line can include one or multiple IP addresses. For instance, adding `ignoreip = 127.0.0.1 192.168.1.1` would whitelist both your local machine and a specific internal network IP. Consider your daily operations and identify IPs that require unhindered access. By doing this, you optimize your server’s performance while maintaining robust security. ###Configuring Ignore Ips
Configuring ignore IPs is a straightforward yet crucial task. This step ensures that certain IP addresses are exempt from Fail2Ban’s ban policies, allowing them uninterrupted access. To configure ignore IPs, you’ll need to access the Fail2Ban jail configuration file, typically found at `/etc/fail2ban/jail.conf`. Within this file, locate the `ignoreip` directive. Here, you can list the IP addresses that should be ignored by Fail2Ban, separated by spaces. For example, if you have remote team members who need consistent access, you might add their IP addresses here. It’s a simple, proactive measure that can save a lot of time and frustration down the line. Do you have a list of IPs that should never face restrictions on your server? If so, ensure they are configured properly to avoid unnecessary disruptions. By doing so, you maintain a seamless and efficient workflow while safeguarding your server.Advanced Customization
Advanced Customization: Fail2Ban is a powerful tool to protect your Linux server from brute force attacks, but its real strength lies in its customization capabilities. By tailoring Fail2Ban to your specific needs, you enhance your server’s security beyond the default settings. Have you ever thought about fine-tuning this tool to seamlessly integrate with other security measures? Let’s dive into some advanced customization techniques that can fortify your defenses.
Modifying Action Configurations
Action configurations in Fail2Ban dictate what happens when a rule is triggered. You can modify these to suit your security strategy better. For instance, instead of just blocking an IP, you might want to send an alert to your email. This keeps you informed in real-time about potential threats.
Think about adding multiple actions for a single rule. You could not only block an IP but also log the event to a dedicated file. This way, you build a comprehensive record of attempted breaches, which can be useful for future analysis.
Customization also allows for setting specific ban durations and intervals. You might have a reason to set shorter bans during the day when you can monitor actively, and longer bans overnight. Experiment with these settings to find what works best for your environment.
Integrating With Other Security Tools
Fail2Ban doesn’t have to work alone. Integrating it with other security tools can create a robust defense system. Consider linking it with your firewall to automate IP blocking at the network level. This adds an extra layer of protection and streamlines your security processes.
Another idea is to integrate Fail2Ban with intrusion detection systems (IDS) or intrusion prevention systems (IPS). This turns your server into a proactive security hub that not only detects but actively prevents attacks. The collaboration between these systems can significantly reduce the risk of breaches.
Have you explored linking Fail2Ban with logging tools like Logwatch or Splunk? This can provide deeper insights into attack patterns and help you refine your security measures. By visualizing data, you gain a clearer understanding of your server’s vulnerabilities.
Advanced customization of Fail2Ban is not just about tweaking settings; it’s about creating a synergistic security strategy. How will you transform your server’s security landscape today?
Troubleshooting Common Issues
Fail2Ban is a powerful tool for enhancing your Linux server’s security. Sometimes, issues arise that require troubleshooting. This guide will help you solve common Fail2Ban problems. From configuration to connectivity, learn how to keep your server safe.
Diagnosing Configuration Errors
Configuration errors can stop Fail2Ban from working properly. First, check your Fail2Ban log files. These logs often show what went wrong. Use the command cat /var/log/fail2ban.log to read them. Look for error messages or warnings. They provide clues about the problem.
Next, verify your configuration files. Ensure they are formatted correctly. A single typo can cause issues. Open the /etc/fail2ban/jail.conf file. Check for misplaced characters or incorrect paths. Use a text editor like Nano or Vim. Save changes and restart Fail2Ban to apply them.
Sometimes, the problem lies in the default settings. Compare your settings with the default configuration. Ensure your customizations are correct. If unsure, temporarily revert to default settings. This helps identify if your changes caused the error.
Resolving Connectivity Problems
Connectivity problems can affect Fail2Ban’s effectiveness. Check your server’s network settings first. Ensure the server has a stable internet connection. Use ping commands to test connectivity. For example, ping google.com checks your connection to the internet.
Firewall settings can also cause connectivity issues. Ensure Fail2Ban rules are correctly applied. Use iptables -L to list current firewall rules. Check if Fail2Ban rules are active. If missing, restart the Fail2Ban service. Use the command sudo service fail2ban restart.
Sometimes, updates or system changes disrupt connectivity. Check for recent updates or changes. Review system logs for unusual activity. This can help identify the cause of the problem. Adjust settings as necessary to restore connectivity.
Credit: www.youtube.com
Frequently Asked Questions
What Is Fail2ban And Its Purpose?
Fail2Ban is a security tool for Linux servers. It protects against unauthorized access by monitoring logs and banning suspicious IPs. By detecting failed login attempts, it enhances server security, preventing brute-force attacks. It’s widely used to safeguard servers effectively against malicious activities.
How Does Fail2ban Improve Server Security?
Fail2Ban improves security by monitoring server logs for failed login attempts. It identifies suspicious IP addresses and bans them temporarily. This prevents repeated unauthorized access attempts, reducing the risk of brute-force attacks. As a result, it strengthens the server’s defenses against intrusions.
Can Fail2ban Be Customized For Specific Services?
Yes, Fail2Ban can be customized for various services. You can configure it to monitor specific log files and set custom rules. This allows you to tailor its protection based on the services running on your server, enhancing its effectiveness against targeted attacks.
How To Install Fail2ban On Linux?
To install Fail2Ban on Linux, use your package manager. On Debian-based systems, run `sudo apt-get install fail2ban`. For Red Hat-based systems, use `sudo yum install fail2ban`. After installation, configure it by editing the jail. conf file to suit your security needs.
Conclusion
Protecting your Linux server with Fail2Ban is smart and simple. This tool blocks unwanted access quickly. It keeps your server safe from repeated attacks. With Fail2Ban, you can customize settings easily. It’s a reliable choice for server security. Start using it to ensure peace of mind.
Your data stays secure, and your server runs smoothly. Remember to update regularly for best results. A secure server means better performance. Keep your Linux server safe with Fail2Ban. Enjoy improved security and fewer worries. Your server deserves the best protection.
-

 DevOps7 years ago
Saltstack Tutorial for beginners [2025]
-

 DevOps7 years ago
How to build a Docker cron job Container easily [2025]
-

 Linux7 years ago
mail Command in Linux/Unix with 10+ Examples [2025]
-

 DevOps7 years ago
Docker ADD vs COPY vs VOLUME – [2025]
-
 DevOps6 years ago
How to setup Pritunl VPN on AWS to Access Servers
-

 Linux7 years ago
Grep Command In Unix/Linux with 25+ Examples [2025]
-

 Linux7 years ago
Find command in Unix/Linux with 30+ Examples [2025]
-
Linux6 years ago
How To setup Django with Postgres, Nginx, and Gunicorn on Ubuntu 20.04