
Linux
How To setup Django with Postgres, Nginx, and Gunicorn on Ubuntu 20.04
Django is a free and opensource high-level Python web framework that you can use to get your Python web applications up and running. Maintained by Django Software Foundation, Django ships with a development server that you can use for giving your code a test run on your local system. However, if you are aiming at deploying an application on a production server, you need a more powerful and secure web server. Gunicorn is a fast and lightweight WSGI HTTP server that is compatible with most web frameworks such as Django. It takes away a great deal of workload that a web application needs to undertake by performing the following:
- Handling HTTPS connections.
- Hosting static files.
- Ensuring that an application can scale with ease.
- Recovering from application crashes.
In this guide, we are going to install Gunicorn with Postgres, Nginx and Gunicorn on Ubuntu 20.04. We are going to set up a PostgreSQL database engine in the place of the default SQLite database. Thereafter, we will install and set up the Gunicorn application server that will interface with our application. The Nginx web server will be used to reverse proxy to Gunicorn, allowing us to access its much-needed performance and security features to serve our apps.
Prerequisites
To get started, ensure that you have a fresh instance of Ubuntu 20.04 LTS with a regular user with administrative privileges. Also, ensure that you have a stable internet connection for installing the various components that are required.
Step 1: Install the requisite Packages
To start off, we will begin with the installation of the requisite software packages from Ubuntu repositories. Later, we will proceed to use pip – Python’s package manager – to install additional requisite packages.
First, begin by updating the system package list.
|
1 |
$ sudo apt update |
Next, we are going to install pip3, the Python development files that will prove essential when building Gunicorn, PostgreSQL database, Nginx web server and all the libraries and dependencies required to interact with PostgreSQL. Therefore, execute the command:
|
1 |
$ sudo apt install python3-pip python3-dev libpq-dev postgresql postgresql-contrib nginx curl |
Once the installation is complete, we are going to create the PostgreSQL database and user and later on optimize the database
Step 2: Creating a database and database user in PostgreSQL
The next step is to create a database and database user for the Django application.
For local connections, Postgres uses a mode of authentication called “peer authentication” This is where if a valid Postgres username matches a system’s username, then the user logs in without the need for any authentication.
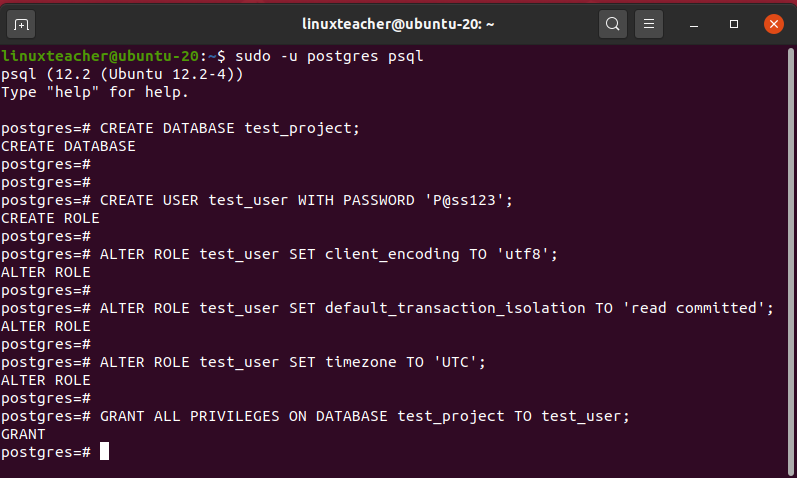
Upon installation, PostgreSQL creates a user called ‘postgres‘ which corresponds to PostgreSQL admin user. We will use this user to log into the database as shown.
|
1 |
$ sudo -u postgres psql |
Once you’ve logged in, create the project’s database as shown:
|
1 |
# CREATE DATABASE test_project; |
Next, create the database user
|
1 |
# CREATE USER test_user WITH PASSWORD 'strongpassword'; |
Once the user is created, we are going to make a few tweaks to the connection parameters to optimize database operations. Django project recommends the following
First, we will configure the default encoding to UTF-8 as per Django’s requirements.
|
1 |
# ALTER ROLE test_user SET client_encoding TO 'utf8'; |
Next, we will set the default transaction isolation scheme to “read committed”.
|
1 |
# ALTER ROLE test_user SET default_transaction_isolation TO 'read committed'; |
And lastly. we will set the timezone to UTC.
|
1 |
# ALTER ROLE test_user SET timezone TO 'UTC'; |
Now grant the user access to manage the database as shown:
|
1 |
# GRANT ALL PRIVILEGES ON DATABASE test_project TO test_user; |
To exit from PostgreSQL prompt, run:
|
1 |
# \q |
Perfect! We have in place the database for our Django project. Next, we are going to prepare a Python Virtual Environment for our project.
Step 3: Creating a Python virtual environment for Django Project
With our database in place, let get along with setting up other project requisites. We shall set up a virtual environment with which we shall use to install additional Python requirements.
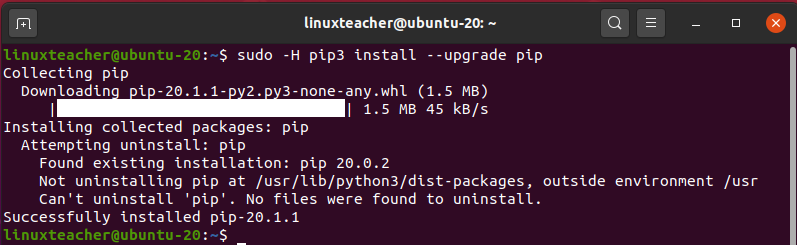
First, we shall install and upgrade pip3 by running the following command:
|
1 |
$ sudo -H pip3 install --upgrade pip |
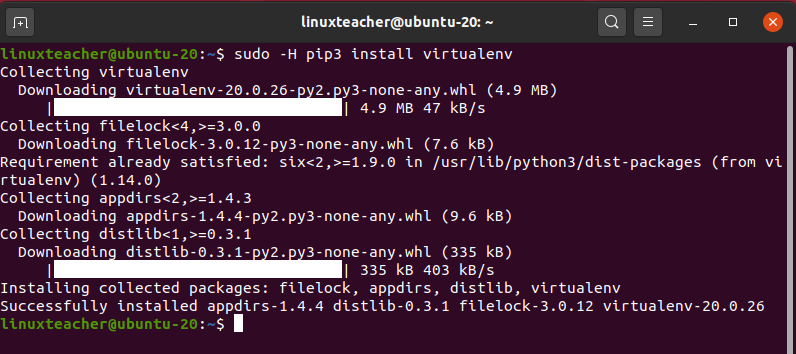
Next, using pip3 install the virtual environment as shown:
|
1 |
$ sudo -H pip3 install virtualenv |
Great, with the virtualenv in place, we can begin creating our project. We will create a project directory and navigate into it using the commands below.
|
1 |
$ mkdir ~/my_project && cd ~/my_project |
Inside the project directory, create a virtual environment as shown.
|
1 |
$ virtualenv my_projectenv |
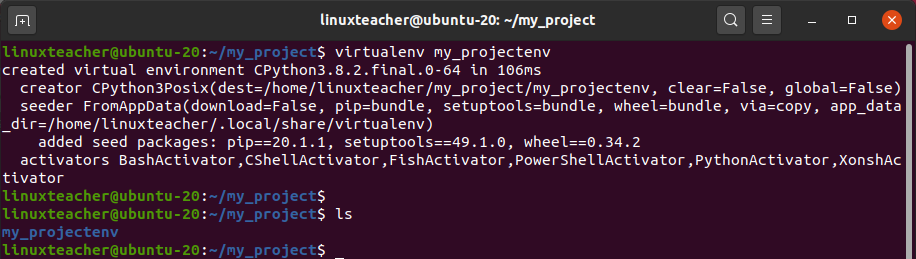
This creates a new directory called ‘my_projectenv‘ inside the ‘my_project‘ directory. Within the ‘myprojectenv‘ directory, we are going to install a local Python and pip version.
But before we do so, we will activate the virtual environment by executing the command:
|
1 |
$ source /my_projectenv/bin/activate |

The prompt will now change to :
|
1 |
(my_projectenv)user@host:~/myproject$ |
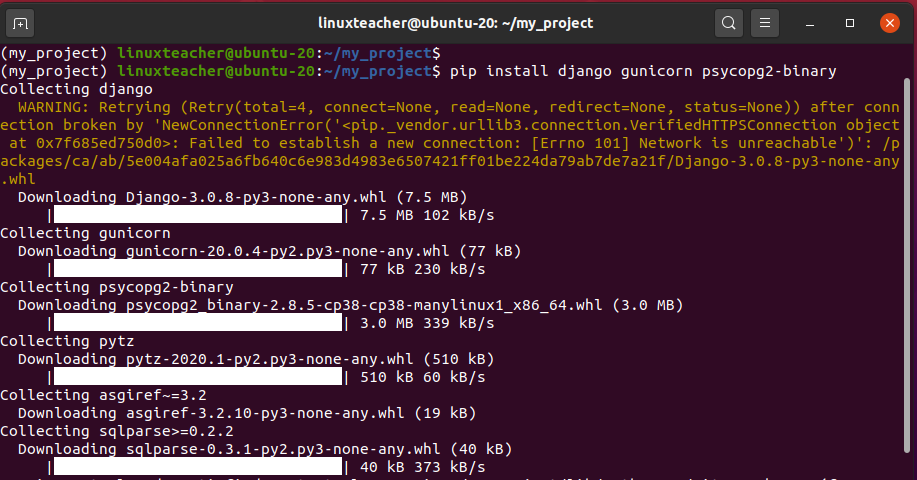
Within the virtual environment, you will install Gunicorn, Django and psycopg2 which is PostgreSQL’s adaptor using pip. Therefore, execute the command:
|
1 |
$ pip install django gunicorn psycopg2-binary |
You now have all the prerequisite software packages for the Django project.
Step 4: Creating and Setting up a new Django project
We already the Python requirements already in place. Let’s now touch base and begin creating actual project files for Django.
Creating the Django project
We are going to instruct Django to create a second-level directory that holds the actual code and also accommodates a management script. Therefore run the command:
|
1 |
$ django-admin.py startproject django_project ~/my_project |
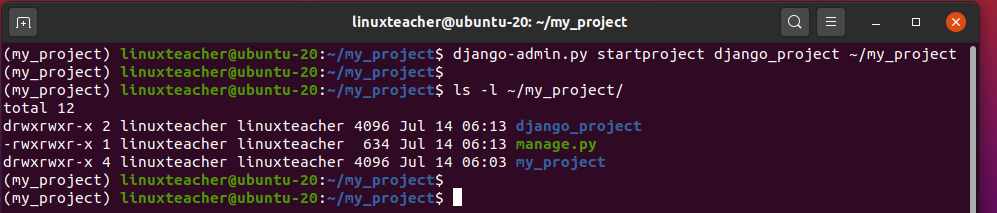
Inside the ~/my_project directory, you should now have the following files:
- django_project: This is Django’s project package. It should contain the settings.py, wsgi.py, asgi.py, urls.py and init.py files.
- manage.py: This is Django’s management script.
- my_projectenv: This is the virtual environment directory created earlier.
Modifying the project settings
We need to make a few tweaks to the settings of the project files. To do so, open the ‘settings.py‘ file using the text editor of your choice.
|
1 |
$ sudo vim ~/my_project/django/settings.py |
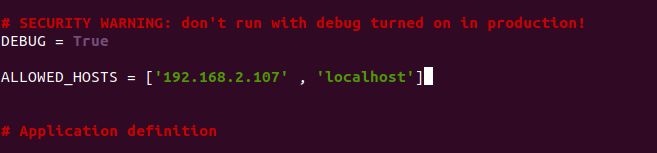
Scroll and locate the ‘ALLOWED_HOSTS‘ directive. This specifies a list of IP addresses of domain names that can connect to your Django instance. Inside the square brackets, list the IP addresses that are associated with your Django server. Ensure that you enclose each entry with single quotation marks and separated by a comma as shown below.
NOTE:
Ensure that you include the ‘localhost‘ option since connections will be queried using the locally installed Nginx instance.
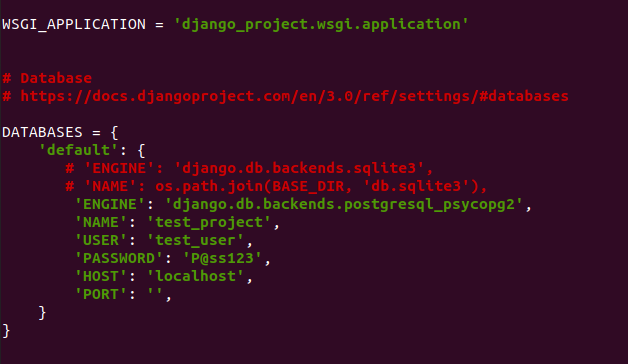
Next, scroll to the ‘DATABASES‘ section. The default settings are for SQLite database and we need to change that since our Django project will use the PostgreSQL database.
Comment the ‘ENGINE‘ attribute since we are not using the SQLite database and the ‘NAME‘ attribute as well since we are going to specify our own database name that we created in PostgreSQL.
For the ‘ENGINE‘ attribute, instruct Django to use psycopg2 adapter and specify the database name, username, password and host as shown.
Thereafter, scroll all the way to the bottom and append the following line:
|
1 |
STATIC_ROOT = os.path.join(BASE_DIR, 'static/') |
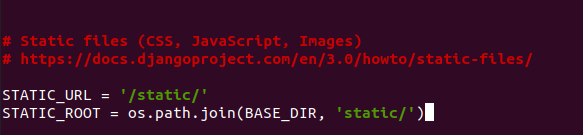
This line indicates where static files should be placed and this is to simplify the handling of requests by Nginx web server.
Finally, save and exit from the configuration file.
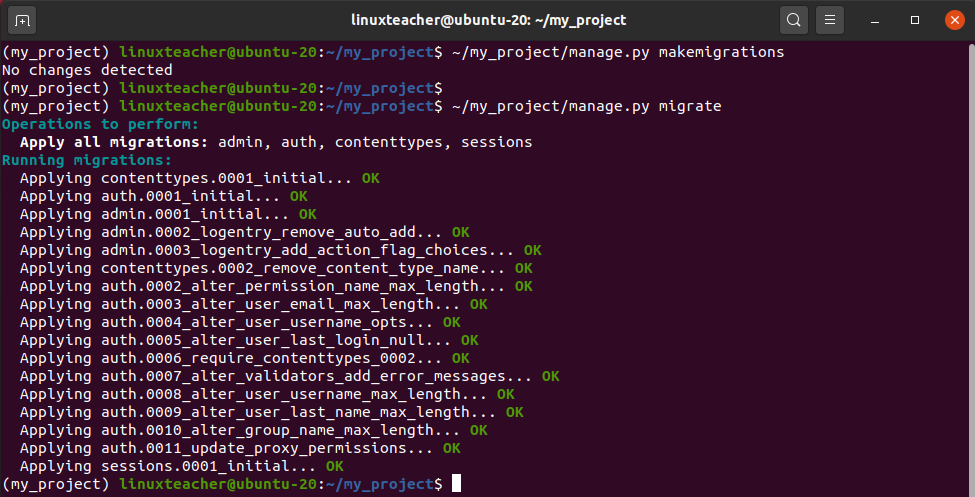
Step 5: Finalize the initial project setup
The first step in completing the initial project set up is to migrate the initial database schema to PostgreSQL database via the ‘manage.py‘ management script.
Run the commands below:
|
1 2 3 |
$ ~/my_project/manage.py makemigrations $ ~/my_project/manage.py migrate |
Next, create an administrative user for the project as shown:
|
1 |
$ ~/my_project/manage.py createsuperuser |
You will be required to provide an email address, provide a password and then confirm it.

Then gather all the static content into the directory
|
1 |
$ ~/my_project/manage.py collectstatic |

These static files will be stored inside a directory called ‘static‘ located within your directory.
Configuring the firewall
We are going to run the test Django project via port 8000, and with this in mind, we are going to allow the port on the firewall. Therefore run the commands below:
|
1 2 3 |
$ sudo ufw allow 8000/tcp $ sudo ufw reload |
Then finally, you can test the Django development server by running the command:
|
1 |
~/my_project/manage.py runserver 0.0.0.0:8000 |
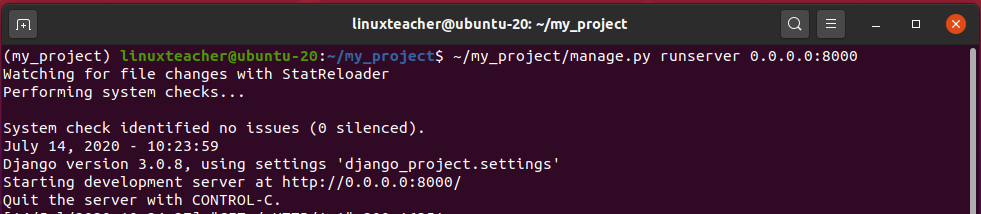
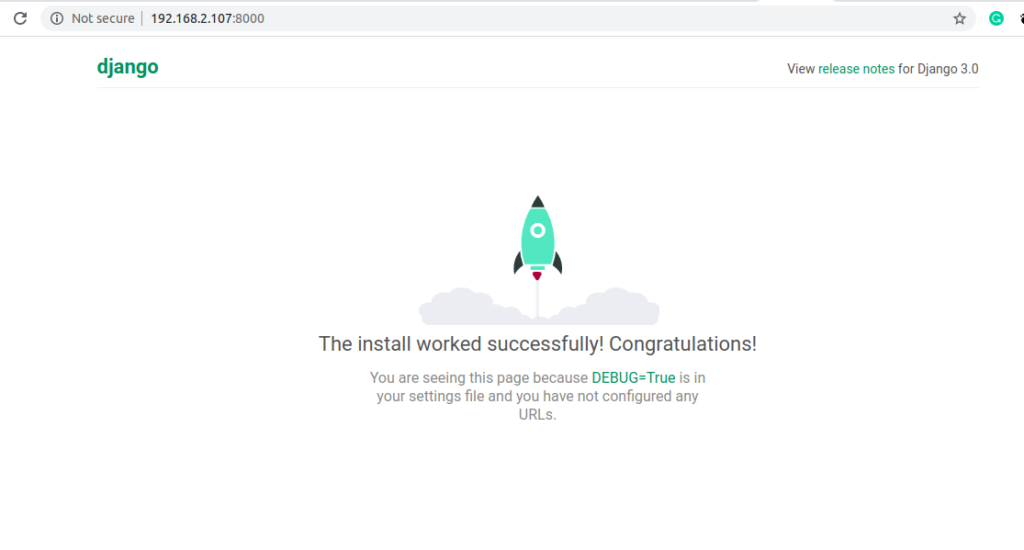
The Django development server has now been started and is listening on port 8000. To view its front end, open your browser and browse your server’s IP address as shown:
|
1 |
http://server-IP:8000 |
If all went according to plan, you should get the default Django development page shown.
To log in as the admin user, append the ‘/admin' suffix at the end of the URL. Enter the username and password you provided when creating the administrative user using the createsuperuser attribute.
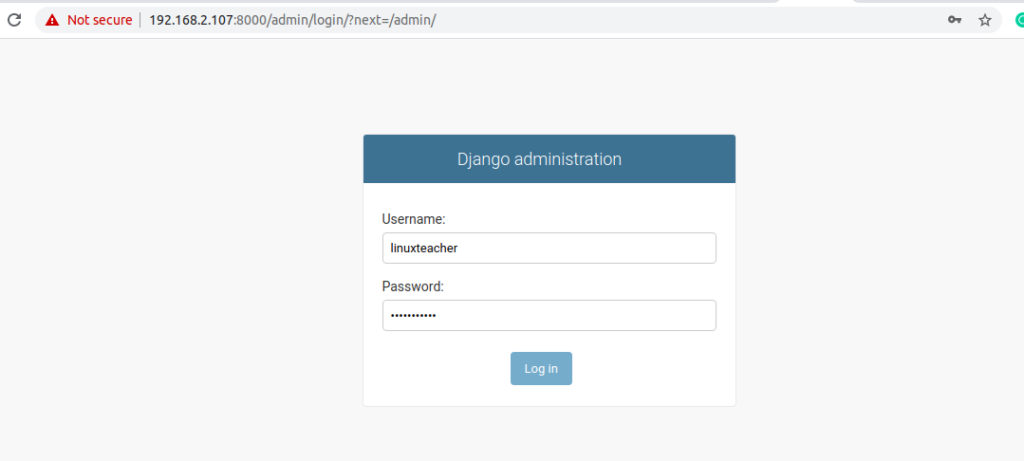
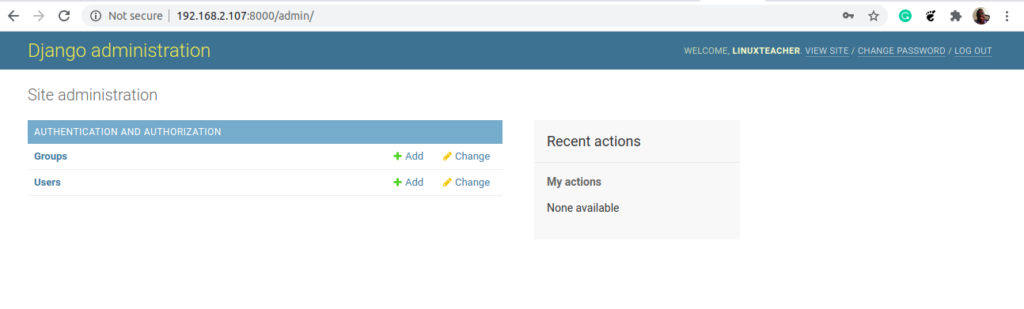
Click on the ‘Login‘ button and this will usher you to the admin dashboard.
When you are done, hit CTRL + C to exit and stop the development server.
Step 6: Ensuring that Gunicorn can serve the Django Project
We have successfully tested our Django development server and ensured that it’s running as expected on the browser. Now we need to test the ability of Gunicorn’s to serve the Django project.
To do so, we will navigate into the Project’s folder and load the WSGI module
|
1 2 3 |
$ cd ~/my_project $ gunicorn --bind 0.0.0.0:8000 django_project.wsgi |
This will launch Gunicorn’s interface. However, the interface will not have the CSS styling since Gunicorn does not have any idea where to find the static CSS content.
Once again, when you are done testing hit the CTRL + C to quit and stop Gunicorn. Having finished testing Django’s project, run the command below to exit from the virtual environment.
|
1 |
$ deactivate |
The virtual environment prompt will now disappear.
Step 7: Making Gunicorn a systemd service and create service files
Having confirmed that Gunicorn can interact with Django’s app server, we are going to implement a more robust and efficient wat to start and stop the Django application server. For this, we need to create a systemd service and socket files.
Create a Gunicorn socket file
Gunicorn socket is going to be created on boot up and will begin to listen for incoming connections. When a connection happens, systemd will automatically trigger the start of Gunicorn to handle the connections.
We are going to create Gunicorn’s systemd socket file as shown:
|
1 |
$ sudo vim /etc/systemd/system/gunicorn.socket |
We are going to add 3 sections. First, we will define the [unit] section to define the socket, [Socket] section to specify the Socket’s location and finally, the [Install] section to ensure the timely creation of the Socket.
|
1 2 3 4 5 6 7 8 |
[Unit] Description=gunicorn socket [Socket] ListenStream=/run/gunicorn.sock [Install] WantedBy=sockets.target |
Save the configuration file and exit.
Create Gunicorn systemd file
Next, we are going to create a systemd file for Gunicorn as shown:
|
1 |
$ sudo vim /etc/systemd/system/gunicorn.service |
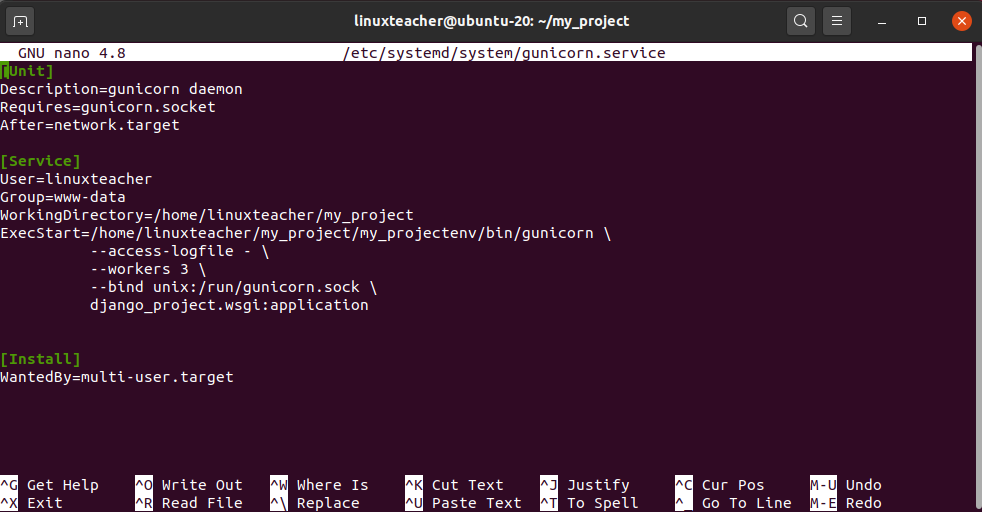
We will start with the the [unit] where we will define the dependencies and metadata. We will define a short description of the service and instruct init system to start only if the networking target is reached. Since the service relies on the socket, we will specify a 'Requires' directive.
|
1 2 3 4 |
[Unit] Description=gunicorn daemon Requires=gunicorn.socket After=network.target |
Next, we are going to define the [Service] option where we shall specify a user and group that the process will run under. Additionally, we shall grant the regular user ownership of the process and grant group ownership to www-data group for Nginx to communicate seamlessly with Gunicorn.
We are then going to map out a working directory and define a command for starting the service. In particular, we will define the full path to Gunicorn’s executable installed in the virtual environment. Later we shall bind the process to the Unix socket located in the /run directory for the process to smoothly communicate with Nginx.
|
1 2 3 4 5 6 7 8 9 |
[Service] User=linuxteacher Group=www-data WorkingDirectory=/home/linuxteacher/my_project ExecStart=/home/linuxteacher/my_project/my_projectenv/bin/gunicorn \ --access-logfile - \ --workers 3 \ --bind unix:/run/gunicorn.sock \ django_project.wsgi:application |
Lastly, we shall append an [Install] section to specify the run-level to use upon booting, which in this case is multi-user.
|
1 2 |
[Install] WantedBy=multi-user.target |
The complete systemd file is as shown:
Save and exit the configuration file.
Step 8: Managing Gunicorn socket
Now start and enable the Gunicorn socket.
|
1 2 3 |
$ sudo systemctl start gunicorn.socket $ sudo systemctl enable gunicorn.socket |

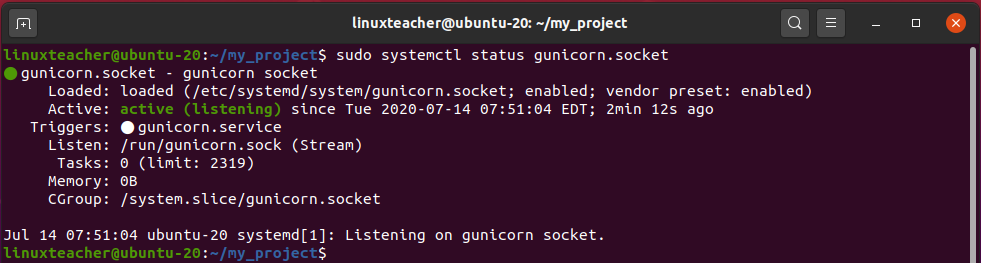
To verify that Gunicorn systemd service is running, execute the command:
|
1 |
$ sudo systemctl status gunicorn.socket |
Additionally, verify the existence of the gunicorn.sock file in the /run directory.
|
1 |
$ file /run/gunicorn.sock |

If you encounter an error, check out the configuration file /etc/systemd/system/gunicorn.socket to fix any errors before proceeding.
Step 9: Testing Socket Activation
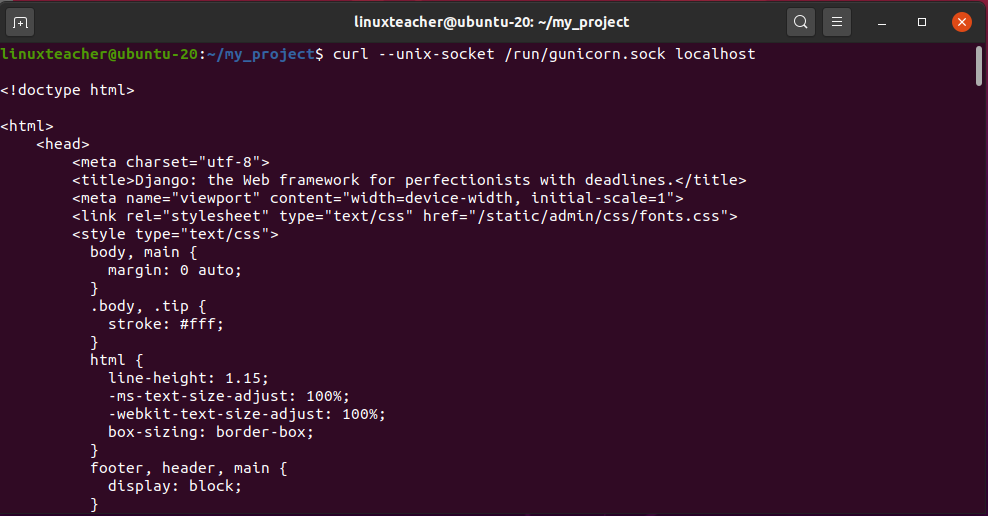
To test the socket activation, we need to use the curl command to send a connection to the socket.
|
1 |
$ curl --unix-socket /run/gunicorn.sock localhost |
The command will print hundred of HTML code clearly indicating that Gunicorn service was started and now has the ability to serve your Django application.
To verify that Gunicorn is running smoothly, execute the command:
|
1 |
$ sudo systemctl status gunicorn |
If you get an error from checking the status of Gunicorn service or from running the curl command, check /etc/systemd/system/gunicorn.service configuration file for errors.
Once you’ve made the changes to the configuration file, reload the daemon and restart Gunicorn’s service.
|
1 2 3 |
$ sudo systemctl daemon-reload $ sudo systectl restart gunicorn |
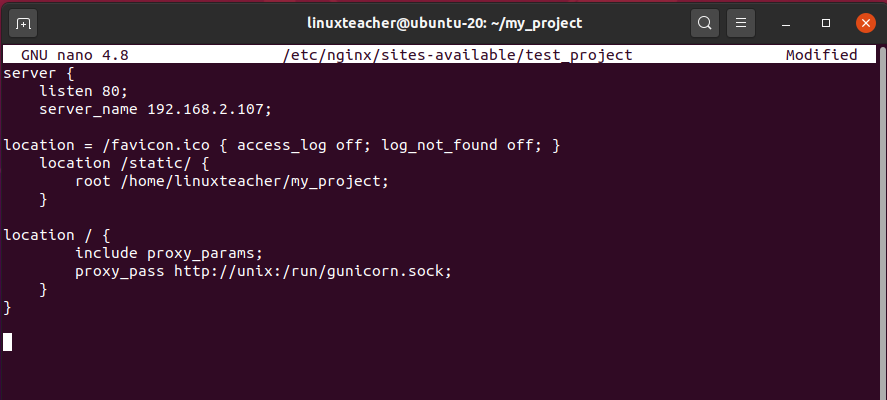
Step 10: Setup Nginx to proxy pass to Gunicorn
This is the very last step. Here, we will configure Nginx to pass traffic to Gunicorn and serve Django’s application content. we will begin by creating a new server block file in the sites-available directory.as shown.
|
1 |
$ sudo nano /etc/nginx/sites-available/test_project |
Begin by specifying that the block will listen to HTTP port 80 and at the same time respond to the server’s IP or domain name.
|
1 2 3 4 |
server { listen 80; server_name server_domain_or_IP; } |
Thereafter, we will add a few lines instructing Nginx to overlook any issues in locating a favicon. Additionally, we shall tell Nginx where to locate the static assets collected in our ~/my_project/static directory.
|
1 2 3 4 |
location = /favicon.ico { access_log off; log_not_found off; } location /static/ { root /home/linuxteacher/my_project; } |
Lastly, we shall create a location / {} block that will match all other requests. Inside the block, we shall include a standard proxy_params file that comes included with Nginx installation and then pass traffic straight to the Gunicorn socket.
|
1 2 3 4 |
location / { include proxy_params; proxy_pass http://unix:/run/gunicorn.sock; } |
The final configuration file looks as shown:
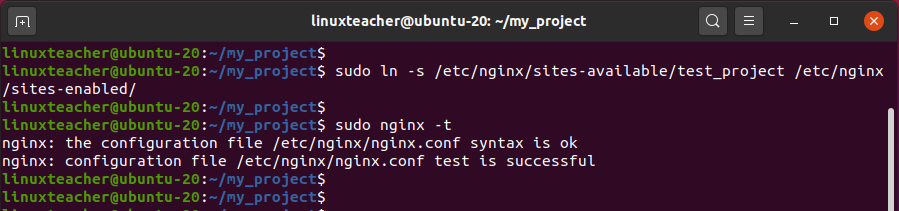
Save and exit the configuration file. Now enable the file by creating a soft link to the /etc/sites/enabled directory.
|
1 |
$ sudo ln -s /etc/nginx/sites-available/test_project /etc/nginx/sites-enabled |
To ensure that all the Nginx settings are error-free execute the command:
|
1 |
$ sudo nginx -t |
Perfect, now restart Nginx web server for all the changes to take effect.
|
1 |
$ sudo systemctl restart nginx |
On the firewall, allow Nginx traffic and delete the firewall rule that opens port 8000 since Nginx will be now be handling the Django content via Gunicorn.
|
1 2 3 4 5 |
$ sudo ufw allow 'Nginx Full' $ sudo ufw delete allow 8000 $ sudo ufw reload |
From now going forward, the Django application content will be handled by Gunicorn and can be accessed by simply typing the server’s IP address.
-

 DevOps7 years ago
Saltstack Tutorial for beginners [2025]
-

 DevOps7 years ago
How to build a Docker cron job Container easily [2025]
-

 Linux7 years ago
mail Command in Linux/Unix with 10+ Examples [2025]
-

 DevOps7 years ago
Docker ADD vs COPY vs VOLUME – [2025]
-
 DevOps6 years ago
How to setup Pritunl VPN on AWS to Access Servers
-

 Linux7 years ago
Grep Command In Unix/Linux with 25+ Examples [2025]
-

 Linux7 years ago
Find command in Unix/Linux with 30+ Examples [2025]
-

 Linux7 years ago
Whereis command in Linux with 10+ Examples [2025]