
DevOps
How to create a private Docker registry without https, SSL
In this article, we will create a Linux private docker registry without https, SSL. few months ago when I was trying to set up a private docker registry without https there was no proper guide on the internet, thas why I decided to create this guide.
So let’s start.
Install Docker
first of all, we have to install docker in a Linux box which we are going to use as the docker registry.
you can install docker using this command:
in centos 7,RedHat
|
1 |
yum install docker |
in ubuntu
|
1 |
apt-get install docker.io |
then start the docker service:
|
1 |
systemctl start docker |
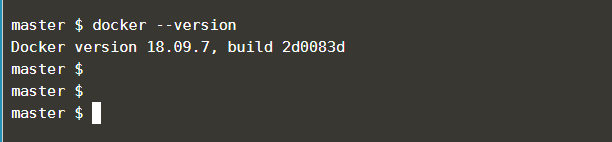
you can verify docker installation using this:
|
1 |
docker --version |
Run Docker Registry Image
now we can install the docker registry in this Linux box. actually registry is just a docker container.
so let’s pull it from the docker hub and run. Please check below, for example, docker run command.
|
1 2 3 4 |
docker run -d -p 5000:5000 --name linuxteacherregistry \ --restart always \ -e REGISTRY_STORAGE_DELETE_ENABLED=true \ registry:2 |
-p 5000:5000 –> this is the port mapping from your Linux box port 5000 to container port 5000.
–name linuxteacherregistry –> you can give any name you want for this
-e REGISTRY_STORAGE_DELETE_ENABLED=true –> This is an environment variable and will be valuable for you in the feature. we will discuss this later in this article.
registry:2 = docker registry image we are pulling from the docker hub.
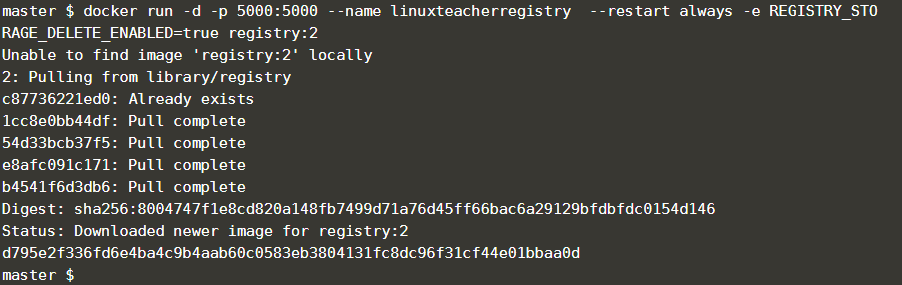
now run the above command.it will download the registry image from the docker hub and create your docker registry within a minute. that’s the beauty of docker 🙂
you can verify it using:
docker ps or docker container list (its the same command but docker ps is the old command.)
|
1 |
$ docker ps | grep linuxteacherregistry |

you can grep it by using the name you provided earlier.
Congratulations your docker registry is up and running 🙂
Access docker registry without https/SSL
now your private docker registry is running. you can access the docker registry using your Linux box IP or localhost.
But it’s hard to memorize the IP address when we access the docker registry from other Linux boxes.
so now we are going to give a name to the registry.
Let’s add an entry to /etc/hosts file in the servers.
NOTE: you have to add this entry to all /etc/hosts files on the servers which access this docker registry.
|
1 |
vim /etc/hosts |
you can give any name you want. no need to be it a .com or valid domain.because our traffic is not going through the public internet.
so I’m giving “registry.linuxteacher.com”.
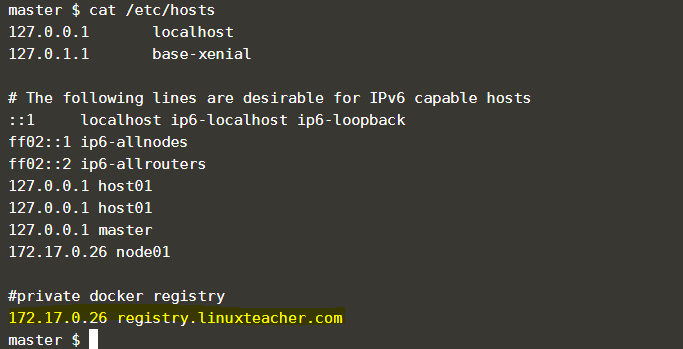
17.17.0.26 = replace it with your Linux box IP which is used to run the Docker registry
registry.linuxteacher.com = replace with any name you want.
Push to the private registry
Now let’s try to push an image to our registry.
first of all download a sample image from the docker hub to test.
|
1 |
docker pull ubuntu:16.04 |
Tag It
then you have to tag the image with your private docker registry name and port.
Example:
|
1 |
docker tag ubuntu:16.04 registry.linuxteacher.com:5000/ubuntu:16.04 |
replace the “registry.linuxteacher.com” with your registry name.

now docker knows the part before “/” is the docker registry name. otherwise, docker will try to push to the docker hub and will get an error message like “unauthorized: authentication required”
Push it.
lets push the image to our registry.
|
1 |
docker push registry.linuxteacher.com:5000/ubuntu:16.04 |
wooh.. you will get an error like a bellow because of docker try to push the image using HTPPS.
|
1 2 3 |
master $ docker push registry.linuxteacher.com:5000/ubuntu:16.04 The push refers to repository [registry.linuxteacher.com:5000/ubuntu:16.04] Get https://registry.linuxteacher.com:5000/v2/: http: server gave HTTP response to HTTPS client |
Disable HTTPS error message
To avoid the above error, you have to create a daemon.json file or edit that file. file location is this:
/etc/docker/daemon.json
then add bellow entry to it.
|
1 2 3 |
{ "insecure-registries" : ["registry.linuxteacher.com:5000"] } |
Replace the “registry.linuxteacher.com” with your private docker registry name.
NOTE: you have to add the above entry to all your Linux boxes that access this docker registry.
Reload Docker daemon
After that, you have to restart or reload the Docker daemon. otherwise change will not be affected.
|
1 |
systemctl Reload Docker |
Now you can push to your docker registry without an issue using the above push command.
|
1 |
docker push registry.linuxteacher.com:5000/ubuntu:16.04 |
Congratulations!! you have successfully created a private docker registry without https 🙂
when I was creating my registry I had a bunch of questions in my head like,
how to view images in the registry or delete images from registry or view tags of an image?
I think you have some questions like above in your head. 🙂
so let’s find the answers to the above questions from our next article.
Also, in the previous article, we discussed different between docker add vs copy vs volume. Give it a try 🙂
-

 DevOps7 years ago
Saltstack Tutorial for beginners [2025]
-

 DevOps7 years ago
How to build a Docker cron job Container easily [2025]
-

 Linux7 years ago
mail Command in Linux/Unix with 10+ Examples [2025]
-

 DevOps7 years ago
Docker ADD vs COPY vs VOLUME – [2025]
-
 DevOps6 years ago
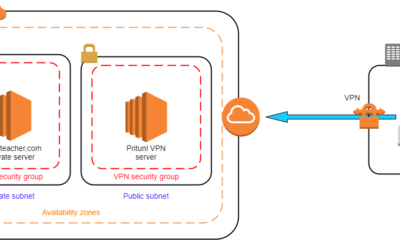
How to setup Pritunl VPN on AWS to Access Servers
-

 Linux7 years ago
Grep Command In Unix/Linux with 25+ Examples [2025]
-

 Linux7 years ago
Find command in Unix/Linux with 30+ Examples [2025]
-
Linux6 years ago
How To setup Django with Postgres, Nginx, and Gunicorn on Ubuntu 20.04